

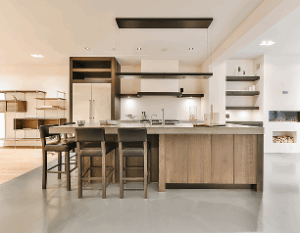
Quick Summary: A successful hardwood floor installation involves much more than laying boards across a room. From planning and subfloor preparation to acclimation, installation, and final inspection, each step contributes to the floor’s long-term durability, appearance, and performance.
Introduction
Installing hardwood flooring is a significant investment that can enhance the comfort, appearance, and value of a home for decades. While the finished floor often receives the most attention, its everyday performance depends on the preparation and installation process that happens beforehand.
Every stage from evaluating the subfloor to allowing the wood to acclimate and carefully planning the layout helps reduce the risk of future issues such as gaps, squeaks, or uneven boards.
Understanding how the installation process works allows homeowners to set realistic expectations and make informed decisions before a flooring project begins.
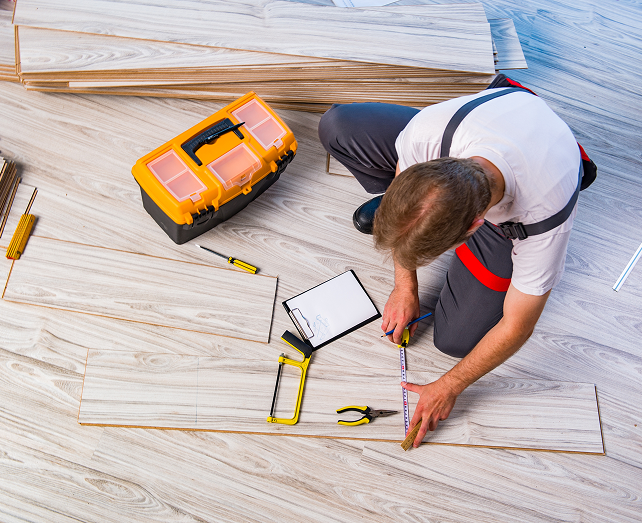
Before Installation: Planning the Project
Every successful flooring project begins with careful planning. Before installation starts, homeowners typically consider the room’s purpose, preferred wood species, plank width, finish, budget, and project timeline. Accurate measurements are also essential to estimate material requirements and account for cutting waste or future repairs.
Taking time to plan these details early helps minimize delays and ensures the flooring selected is suitable for both the home’s design and everyday use.
What to Expect During Installation
Every flooring project is different, but understanding what typically happens during installation can help homeowners prepare their home and schedule with greater confidence.
During the project, homeowners can generally expect:
- Furniture and room preparation: Rooms are usually cleared before work begins to provide safe access and protect belongings.
- Noise and dust: Subfloor preparation, cutting, and sanding (for site-finished floors) may generate temporary noise and dust, although many professionals use dust-control equipment where appropriate.
- Limited room access: Depending on the size of the project, certain rooms may not be accessible while installation or finishing is underway.
- Drying or curing time: Newly finished hardwood floors often require time to cure before heavy furniture is moved back or regular foot traffic resumes. The recommended timeframe varies depending on the finish used.
Knowing what to expect throughout the installation process helps homeowners plan and minimize disruptions while the project is in progress.
Why Proper Installation Matters
Hardwood is a natural material that responds to changes in temperature and humidity. Even high-quality flooring can develop problems if the installation process is rushed or important preparation steps are overlooked.
Proper installation helps:
- Create a stable, level flooring surface
- Reduce the likelihood of squeaks and movement
- Minimize seasonal gaps and expansion issues
- Improve the lifespan of the flooring
- Support a consistent appearance throughout the space
Careful preparation often has a greater impact on long-term performance than the flooring material itself.
The Hardwood Floor Installation Process
➨ Step 1: Measuring the Space and Selecting Materials
The process begins with measuring each room and selecting a hardwood species, plank size, finish, and installation method that suits both the home’s layout and the homeowner’s lifestyle. Material selection also considers factors such as durability, maintenance requirements, and existing interior finishes.
➨ Step 2: Inspecting and Preparing the Subfloor
Before hardwood flooring can be installed, the subfloor should be clean, dry, level, and structurally sound. Any uneven areas, moisture concerns, or damaged sections are typically addressed first to provide a stable foundation for the new flooring.
Why moisture testing matters: Even when a subfloor appears dry, hidden moisture can affect hardwood after installation. Many installers test moisture levels before installation because excessive moisture beneath the floor can contribute to movement, cupping, or finish-related issues later.
➨ Step 3: Allowing the Flooring to Acclimate
Hardwood flooring is generally delivered several days before installation so it can adjust to the home’s indoor environment. This acclimation period allows the wood to adapt to local temperature and humidity conditions, helping reduce excessive expansion or shrinkage after installation.
The recommended acclimation period varies depending on the flooring product and indoor conditions, but manufacturers often recommend allowing the material to adjust before installation.
➨ Step 4: Planning the Layout
Installers determine the direction of the boards, stagger end joints for a natural appearance, and plan transitions between adjoining rooms. Careful layout planning also helps reduce material waste while creating a balanced, visually consistent floor.
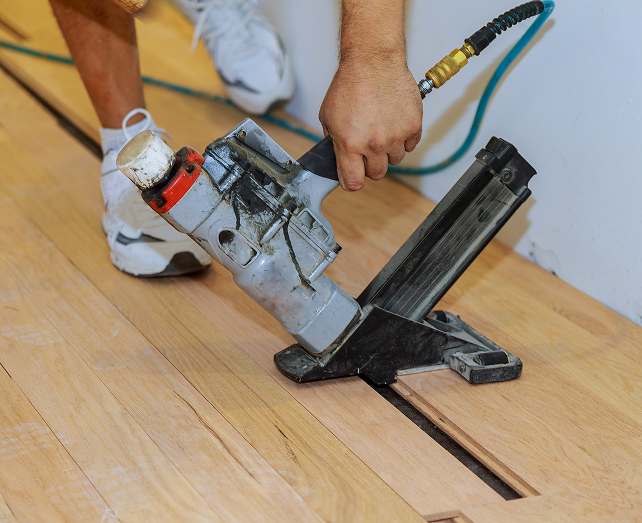
➨ Step 5: Installing the Flooring
Depending on the flooring type and subfloor, boards may be nailed, glued, or installed using a floating system. Expansion gaps are left around the perimeter of the room to allow the wood to respond naturally to seasonal environmental changes.
➨ Step 6: Sanding and Finishing
For site-finished hardwood, the floor is sanded to create a smooth surface before stain and protective finish are applied. Prefinished flooring, on the other hand, arrives with its finish already applied and typically requires fewer finishing steps after installation.
➨ Step 7: Final Inspection
The completed floor is inspected for alignment, secure installation, consistent spacing, smooth transitions, and overall finish quality. Addressing small adjustments before the project is completed helps ensure the flooring performs as intended.
Hardwood Floor Installation Timeline
Installation Stage | Purpose |
Measurement & Planning | Determines material quantities and layout |
Subfloor Preparation | Creates a stable installation surface |
Acclimation | Allows wood to adjust to indoor conditions |
Layout Planning | Improves appearance and minimizes waste |
Installation | Secures the flooring correctly |
Finishing | Protects the wood surface |
Final Inspection | Verifies quality and consistency |
Solid Hardwood vs. Engineered Hardwood
Although both flooring options offer the appearance of real wood, their installation methods and performance characteristics differ.
Feature | Solid Hardwood | Engineered Hardwood |
Installation Method | Typically nail-down | Nail-down, glue-down, or floating |
Moisture Stability | Moderate | Better dimensional stability |
Refinishing Potential | Multiple times | Limited, depending on the wear layer |
Suitable Subfloors | Primarily wood | Wood or concrete |
Best Suited For | Traditional installations | Homes with concrete slabs or varying humidity |
The most suitable option depends on factors such as the home’s construction, subfloor type, and the conditions within each room.
When Professional Installation Makes Sense
Some flooring projects are relatively straightforward, while others involve conditions that require additional planning and technical expertise.
Professional installation is often beneficial when:
- The subfloor requires repair or leveling.
- Multiple connected rooms are being updated.
- Solid hardwood flooring is selected.
- The project includes stairs or detailed room transitions.
- Moisture testing or subfloor preparation is required.
- Not following the flooring manufacturer’s installation guidelines.
A professional assessment can also help identify potential issues before installation begins, reducing the likelihood of unexpected delays or future repairs.
DIY vs. Professional Installation
DIY May Be Suitable | Professional Installation Is Often Better |
Small rooms | Large or connected spaces |
Click-lock engineered flooring | Solid hardwood flooring |
Flat, prepared subfloors | Uneven or damaged subfloors |
Previous flooring experience | Complex layouts or transitions |
Common Installation Mistakes to Avoid
Many installation issues can be prevented through careful preparation and attention to detail.
Common mistakes include:
- Skipping the acclimation period.
- Installing flooring over an uneven or damp subfloor.
- Leaving inadequate expansion gaps around walls.
- Rushing the finishing or curing process.
- Failing to plan the board layout before installation.
Avoiding these mistakes helps improve both the appearance and lifespan of hardwood flooring.
Tips for a Smooth Installation Project
A few simple planning steps can help the installation process move more efficiently.
Confirm project timelines before materials arrive.
- Clear furniture and personal belongings from the work area.
- Allow adequate time for acclimation before installation begins.
- Discuss transitions between different flooring materials in advance.
- Plan room access while finishes are drying or curing.
Homeowners who want to compare hardwood species, plank widths, stain colours, or finish options before installation often visit Pasadena Hardwoods to explore different flooring materials in person. Seeing products side by side can make it easier to choose flooring that complements both the home’s design and long-term maintenance expectations.
Conclusion
A well-installed hardwood floor begins long before the first board is secured in place. Careful planning, thorough subfloor preparation, proper acclimation, and attention to detail throughout the installation process all contribute to a floor that performs well for years to come.
Understanding each stage of installation helps homeowners ask informed questions, plan projects more effectively, and appreciate the craftsmanship involved in creating durable, attractive hardwood flooring that can continue to add value and character to a home for decades.
Knowing what happens before, during, and after installation also makes it easier to communicate with installers and evaluate the quality of the finished work.
Frequently Asked Questions
1. When can I walk on newly installed hardwood floors?
The answer depends on the type of flooring and finish used. Prefinished hardwood can often be walked on sooner than site-finished flooring, while newly applied finishes typically require additional curing time before regular use or moving heavy furniture.
2. Should furniture be removed before hardwood floor installation?
Yes. Clearing furniture and personal belongings before installation helps create a safer workspace and allows the flooring to be installed more efficiently. Many homeowners also remove fragile items from nearby areas to protect them from dust or vibration during the project.
3. What factors affect the timeline for hardwood floor installation?
Project timelines vary based on room size, flooring type, subfloor condition, acclimation requirements, and whether sanding or site finishing is required. Additional repairs or moisture corrections may also extend the schedule.
4. Can existing hardwood flooring be installed in additional rooms?
In some cases, yes. Matching an existing hardwood floor depends on factors such as the wood species, plank dimensions, stain colour, finish, and product availability. Older flooring may also have naturally changed in colour over time, which can affect the final match.
5. Does the season affect hardwood floor installation?
Indoor conditions are generally more important than the season itself. However, temperature and humidity levels can influence acclimation and installation, which is why maintaining stable indoor conditions is recommended before and during the project.